XML is the language in which almost every Transformice map is stored in. XML editing is a core aspect of map making and is necessary to create the advanced mechanics and gameplay features we take for granted in user-made maps.
This page is a fully-fledged guide to aid in understanding and using all the various parameters which make up a map's XML. It is split into different sections, each dealing with its own section of the map XML. Usage examples of each tag and explanations of their uses may be found within these sections to help you to utilize the tags.
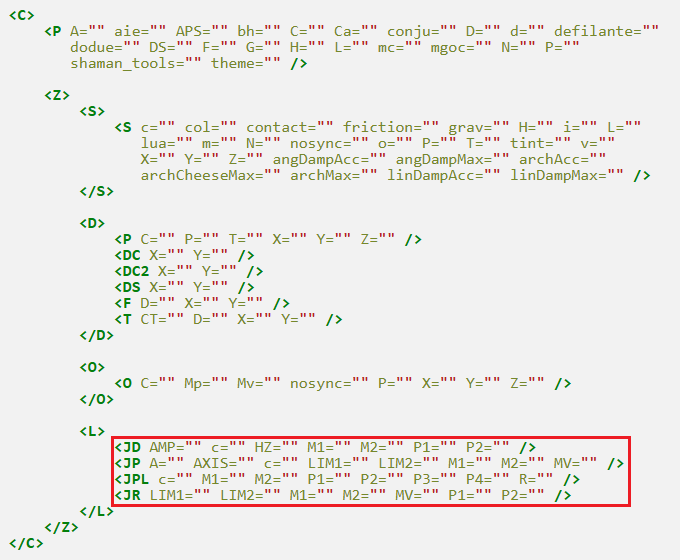
XML tree
<C>
    <P A="" aie="" APS="" bh="" C="" Ca="" conju="" D="" d="" defilante=""
       dodue="" DS="" F="" G="" H="" L="" mc="" mgoc="" N="" P=""
       shaman_tools="" theme="" />

    <Z>
        <S>
            <S c="" col="" contact="" friction="" grav="" H="" i="" L=""
               lua="" m="" N="" nosync="" o="" P="" T="" tint="" v=""
               X="" Y="" Z="" angDampAcc="" angDampMax="" archAcc=""
               archCheeseMax="" archMax="" linDampAcc="" linDampMax="" />
        </S>

        <D>
            <P C="" P="" T="" X="" Y="" Z="" />
            <DC X="" Y="" />
            <DC2 X="" Y="" />
            <DS X="" Y="" />
            <F D="" X="" Y="" />
            <T CT="" D="" X="" Y="" />
        </D>

        <O>
            <O C="" Mp="" Mv="" nosync="" P="" X="" Y="" Z="" />
        </O>

        <L>
            <JD AMP="" c="" HZ="" M1="" M2="" P1="" P2="" />
            <JP A="" AXIS="" c="" LIM1="" LIM2="" M1="" M2="" MV="" />
            <JPL c="" M1="" M2="" P1="" P2="" P3="" P4="" R="" />
            <JR LIM1="" LIM2="" M1="" M2="" MV="" P1="" P2="" />
        </L>
    </Z>
</C>
IDs
Backgrounds
| ID | Image | Name |
|---|---|---|
| -2 | ∅ | Random |
| 0 | 
|
Daylight |
| 1 | 
|
Dawn |
| 2 | 
|
Twilight |
| 3 | 
|
Full moon |
| 4 | Halloween | |
| 5 | 
|
Christmas |
| 6 | Valentine's Day | |
| 7 | 
|
Storm clouds |
| 8 | 
|
Storm clouds 2 |
| 9 | 
|
Desert 1 |
| 10 | 
|
Desert 2 |
| 11 | 
|
Ocean |
Grounds
| ID | Name |
|---|---|
| 0 | Wood |
| 1 | Ice |
| 2 | Trampoline |
| 3 | Lava |
| 4 | Chocolate |
| 5 | Earth |
| 6 | Grass |
| 7 | Sand |
| 8 | Cloud |
| 9 | Water |
| 10 | Stone |
| 11 | Snow |
| 12 | Rectangle |
| 13 | Circle |
| 14 | Invisible |
| 15 | Web |
| 17 | Yellow grass |
| 18 | Pink grass |
| 19 | Acid |
| 20 | Honey |
| 21 | Galaxy |
Decorations
Shaman objects
Map settings
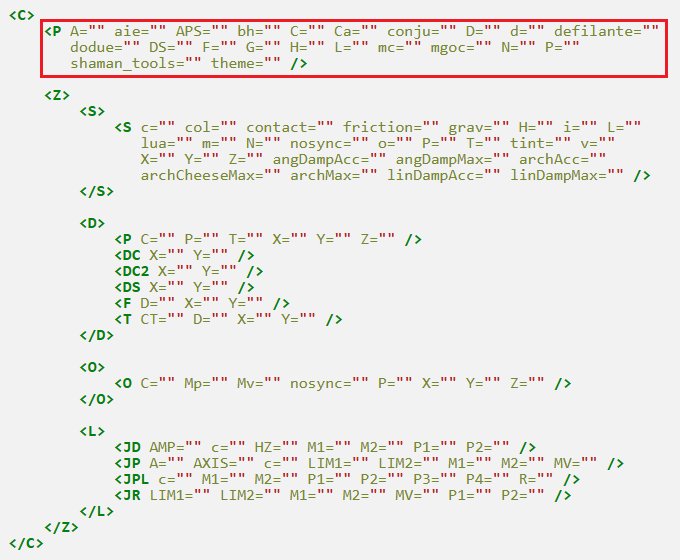
Location of the tag highlighted
<P /> tag
These tags go into <P /> tag at the start of the XML and specify various map settings.
A=""
Effect: Sets the soulmate game mode, as seen in map 84 and various others.
Arguments:
- None.
Example: Activates soulmate for the map. You will see the heart icon ![]() in the top left corner when you validate the map, indicating soulmate mode is active.
in the top left corner when you validate the map, indicating soulmate mode is active.
<C><P A="" /><Z><S><S X="400" L="400" Y="390" H="20" P="0,0,0.3,0.2,0,0,0,0" T="0" /></S><D><DS X="400" Y="370" /></D><O /></Z></C>
aie=""
Effect: Makes mice shock sensitive (fall damage). Falling from heights, high restitution and enclosed spaces will kill the mice.
Arguments:
- None.
Example: Touching the lava will cause mice to die, as shock sensitivity is enabled.
<C><P aie="" /><Z><S><S X="500" L="20" Y="365" H="30" P="0,0,0,20,0,0,0,0" T="3" /><S X="400" L="400" Y="390" H="20" P="0,0,0.3,0.2,0,0,0,0" T="0" /></S><D><DS X="400" Y="370" /></D><O /></Z></C>
APS="url1,?1,x1,y1,ax1,ay1,ix1,iy1;url2,?2,x2,y2,ax2,ay2,ix2,iy2"
Effect: Displays an image in the foreground from the Atelier 801 image database (images.atelier801.com/), which is only visible under certain conditions.
Arguments:
- url1 (url) - The first image to display.
- ?1 - Unknown, just use 0.
- x1 (coordinate) - The player x location on the map where the first image will disappear.
- y1 (coordinate) - The player y location on the map where the first image will disappear.
- ax1 (coordinate) - How far the player mouse is from the argument x1 that the first image will reappear.
- ay1 (coordinate) - How far the player mouse is from the argument y1 that the first image will reappear.
- ix1 (coordinate) - The x location to place the first image.
- iy1 (coordinate) - The y location to place the first image.
- url2 (url) - The second image to display.
- ?2 - Unknown, just use 0.
- x2 (coordinate) - The player x location on the map where the second image will disappear.
- y2 (coordinate) - The player y location on the map where the second image will disappear.
- ax2 (coordinate) - How far the player mouse is from the argument x2 that the second image will reappear.
- ay2 (coordinate) - How far the player mouse is from the argument y2 that the second image will reappear.
- ix2 (coordinate) - The x location to place the second image.
- iy2 (coordinate) - The y location to place the second image.
Notes:
- Multiple different url,?,x,y,ax,ay,ix,iy arguments split by a ";" may be specified to display as many images as desired.
- This feature is only available with Lua-loaded maps.
Example: Displays an image from the database in the foreground of the map (in front of the mice) at position (0,0). The image disappears between the coordinate (100,100) and reappears 600px away from x=100 and 200px away from y=100, which is the coordinate (700,300).
<C><P APS="165e9e21f73.png,0,100,100,600,200,0,0" /><Z><S><S P="0,0,0.3,0.2,0,0,0,0" L="600" o="7581a6" X="400" c="4" Y="200" T="12" H="200" /><S L="100" H="100" X="410" Y="370" T="0" P="0,0,0.3,0.2,-45,0,0,0" /><S L="400" X="600" H="100" Y="340" T="0" P="0,0,0.3,0.2,0,0,0,0" /><S L="800" H="100" X="400" Y="420" T="0" P="0,0,0.3,0.2,0,0,0,0" /></S><D><DS Y="280" X="750" /></D><O><O C="7" Y="360" P="0" X="160" /></O></Z></C>
bh=""
Effect: Allows cannonballs, both pre-spawned on the map or summoned by the shaman in gameplay to be shot upwards.
Arguments:
- None.
Example: The cannonballs are able to be shot upwards.
<C><P bh="" /><Z><S><S X="400" L="400" Y="390" H="20" P="0,0,0.3,0.2,0,0,0,0" T="0" /></S><D><DS X="400" Y="370" /></D><O><O C="17" X="400" P="0" Y="270" /><O C="17" X="440" P="0" Y="270" /><O C="17" X="360" P="0" Y="270" /></O></Z></C>
C=""
Effect: Activates the collision game mode for the map, like in map 9 and various other vanilla maps.
Arguments:
- None.
Example: Activates collision, this can be seen by spawning mice by pressing the M key.
<C><P C="" /><Z><S><S X="400" L="400" Y="390" H="20" P="0,0,0.3,0.2,0,0,0,0" T="0" /></S><D><DS X="400" Y="370" /></D><O /></Z></C>
Ca=""
Effect: Hides anything beyond the current 800 x 400 gameplay screen.
Arguments:
- None.
Example: Activates the game border. This effect can be seen when the ball bounces offscreen.
<C><P Ca="" /><Z><S><S X="400" L="400" Y="390" H="20" P="0,0,0.3,0.2,0,0,0,0" T="0" /></S><D><DS X="400" Y="370" /></D><O><O C="6" X="605" P="0" Y="200" /></O></Z></C>
conju=""
Effect: Allows the shaman to only spawn arrows, spirits, conjuration and ice cubes on the map.
Arguments:
- None.
Example: Activates conjuration mode.
<C><P conju="" /><Z><S><S X="400" L="400" Y="390" H="20" P="0,0,0.3,0.2,0,0,0,0" T="0" /></S><D><DS X="400" Y="370" /></D><O /></Z></C>
D="url1,x1,y1,r1;url2,x2,y2,r2"
Effect: Displays an image in the background from the Transformice image database.
Arguments:
- url1 (url) - The first image to display.
- x1 (coordinate) - The x location where the first image is to be displayed.
- y1 (coordinate) - The y location where the first image is to be displayed.
- r1 (integer) - How many times the first image will repeat every 800px.
- url2 (url) - The second image to display.
- x2 (coordinate) - The x location where the second image is to be displayed.
- y2 (coordinate) - The y location where the second image is to be displayed.
- r2 (integer) - How many times the second image will repeat every 800px.
Notes:
- Multiple different url,x,y arguments split by a ";" may be specified to display as many images as desired.
- The "r" parameter is only available with Lua-loaded maps.
- There is a tutorial on the map backgrounds here.
Example: Displays two different images from the database as backgrounds.
<C><P D="x_transformice/x_evt/x_evt_21/gsvnkdsop/vide.png,250,350;x_transformice/x_evt/x_evt_10/YIKDFERT/BOSS_AnvilGod.png,400,50" /><Z><S><S X="400" L="400" Y="390" H="20" P="0,0,0.3,0.2,0,0,0,0" T="0" /></S><D><DS X="400" Y="370" /></D><O /></Z></C>
d="url1,x1,y1,r1;url2,x2,y2,r2"
Effect: Displays an image in the foreground from the Transformice image database.
Arguments:
- url1 (url) - The first image to display.
- x1 (coordinate) - The x location where the first image is to be displayed.
- y1 (coordinate) - The y location where the first image is to be displayed.
- r1 (integer) - How many times the first image will repeat every 800px.
- url2 (url) - The second image to display.
- x2 (coordinate) - The x location where the second image is to be displayed.
- y2 (coordinate) - The y location where the second image is to be displayed.
- r2 (integer) - How many times the second image will repeat every 800px.
Notes:
- Like the D="" tag, different url,x,y arguments split by a ";" may be specified to display as many images as desired.
- The "r" parameter is only available with Lua-loaded maps.
- There is a tutorial on the map backgrounds here.
Example: Displays an image from the database in the foreground of the map (in front of the mice).
<C><P d="x_transformice/x_maps/x_peche2015/map-aventure-2-foreground.png,0,0" /><Z><S><S X="400" L="400" Y="390" H="20" P="0,0,0.3,0.2,0,0,0,0" T="0" /></S><D><DS X="400" Y="370" /></D><O /></Z></C>
defilante="vi,a,vm,s"
Effect: Activates the defilante game mode on the map, allowing automatic scroll and tokens to be placed.
Arguments:
- vi (decimal) - Initial speed.
- a (decimal) - Scrolling acceleration.
- vm (decimal) - Maximum speed.
- s (boolean) - Free scroll or not. 0 for fixed scroll, 1 for free scroll.
Notes:
- More information on the defilante setting may be found here.
- Using this setting allows maps to scroll to up to 4800px, this can be specified using the H="4800" tag, also found in <P />.
Example: Makes the map start scrolling at 0 speed, then accelerate by 2 speed until it reaches 4 speed. Includes a spring token.
<C><P L="1000" defilante="0,2,4,1" /><Z><S><S X="400" L="400" Y="390" H="20" P="0,0,0.3,0.2,0,0,0,0" T="0" /></S><D><DS X="400" Y="370" /></D><O><O C="16" X="500" P="0" Y="365" /></O></Z></C>
dodue=""
Effect: Sets the dodue game mode, as seen in map 176 and various others. Mice can collect up to three cheese.
Arguments:
- None.
Notes:
- Using the theme="halloween" tag in addition to this tag sets the dodue cheese to the Halloween theme.
Example: Activates dodue for the map.
<C><P dodue="" /><Z><S><S H="20" P="0,0,0.3,0.2,0,0,0,0" L="400" X="400" Y="390" T="0" /></S><D><DS Y="370" X="400" /><F Y="360" X="250" /><F Y="360" X="350" /><F Y="360" X="450" /><F Y="360" X="550" /></D><O /></Z></C>
DS="mode;x,y"
Effect: Sets mouse spawn points. There are multiple modes which can be set in the first argument.
Arguments:
- mode (mode) - Spawn mode, either "m" - set locations, "y" - random x locations or "x" - random y locations.
- x (coordinate) - The x location of the spawn.
- y (coordinate) - The y location of the spawn.
Modes:
- If the mode is "m", the "x" and "y" arguments must be specific positions.
- If the mode is "y", only the "x" argument can be used, it specifies the x coordinate where the mice will spawn along randomly.
- If the mode is "x", only the "y" argument can be used, it specifies the y coordinate where the mice will spawn along randomly.
- The arguments can be specified as many times as desired to create multiple positions.
Example 1: DS spawn with "m" mode, the mice will spawn at the location X: 250, Y: 370 and X: 550, Y: 370.
<C><P DS="m;250,370,550,370" /><Z><S><S X="400" L="400" Y="390" H="20" P="0,0,0.3,0.2,0,0,0,0" T="0" /></S><D /><O /></Z></C>
Example 2: DS spawn with random "y" mode and X coordinate specified, the mice will spawn randomly along the vertical with the X coordinate 400.
<C><P DS="x;400" /><Z><S><S X="400" L="400" Y="390" H="20" P="0,0,0.3,0.2,0,0,0,0" T="0" /></S><D /><O /></Z></C>
Example 3: DS spawn with random "x" mode and Y coordinate specified, the mice will spawn randomly along the horizontal with the Y coordinate 370.
<C><P DS="y;370" /><Z><S><S X="400" L="400" Y="390" H="20" P="0,0,0.3,0.2,0,0,0,0" T="0" /></S><D /><O /></Z></C>
F="id"
Effect: Sets the background for the map.
Arguments:
- id (integer) - The ID of the background selected to display. A list of IDs can be found in the IDs section.
Notes:
- The background will stretch to accommodate maps with scroll.
Example: Displays the Christmas background.
<C><P F="5" /><Z><S><S X="400" L="400" Y="390" H="20" P="0,0,0.3,0.2,0,0,0,0" T="0" /></S><D><DS X="400" Y="370" /></D><O /></Z></C>
G="w,g"
Effect: Sets the wind and gravity force of the map.
Arguments:
- w (decimal) - The strength of wind. No wind is 0. Negative values will give a wind to the left, while positive values will give wind to the right.
- g (decimal) - The strength of gravity. Default is 10. Negative values will give inverted gravity (antigravity), while positive values will give normal gravity (down).
Example: Normal gravity and positive 5 wind, causing the mice to be pushed to the right.
<C><P G="5,10" /><Z><S><S X="500" L="20" Y="365" H="30" P="0,0,0.3,0.2,0,0,0,0" T="0" /><S X="400" L="400" Y="390" H="20" P="0,0,0.3,0.2,0,0,0,0" T="0" /></S><D><DS X="400" Y="370" /></D><O /></Z></C>
H="value"
Effect: Sets the map height.
Arguments:
- value (decimal) - The height of the map, given in pixels. Default (and minimum) is 400, maximum is 800.
Example: Sets map height to 600px. The blue game border in editor is extended to show this.
<C><P H="600" /><Z><S><S X="400" L="400" Y="590" H="20" P="0,0,0.3,0.2,0,0,0,0" T="0" /></S><D><DS X="400" Y="370" /></D><O /></Z></C>
L="value"
Effect: Sets the map height.
Arguments:
- value (decimal) - The length of the map, given in pixels. Default (and minimum) is 800, maximum without Defilante="" is 1600, with Defilante="" it is 4800.
Example: Sets map length to 1000px. The blue game border in editor is extended to show this.
<C><P L="1000" /><Z><S><S X="400" L="400" Y="590" H="20" P="0,0,0.3,0.2,0,0,0,0" T="0" /></S><D><DS X="400" Y="370" /></D><O /></Z></C>
mc=""
Effect: Hides all nails pre-spawned on the map when the map is played. Nails in the shaman's build will not be hidden.
Arguments:
- None.
Example: Hides the red motor nail which turns the plank.
<C><P mc="" /><Z><S><S X="400" L="400" Y="390" H="20" P="0,0,0.3,0.2,0,0,0,0" T="0" /></S><D><DS X="400" Y="370" /></D><O><O C="4" X="400" P="0" Y="200" /><O C="12" X="400" P="0" Y="200" /></O></Z></C>
mgoc="value"
Effect: Alters the mass of any shaman object summoned on the map by the shaman or pre-placed in the editor.
Arguments:
- value (decimal) - The value to set the mass of all objects to.
Example: Sets both the anvil and the box to 100 weight.
<C><P mgoc="100" /><Z><S><S X="400" L="400" Y="390" H="20" P="0,0,0.3,0.2,0,0,0,0" T="0" /><S X="400" L="20" Y="280" H="200" P="0,0,0.3,0.2,0,0,0,0" T="8" /><S X="400" L="400" Y="170" H="20" P="1,0,0.3,0.2,0,0,0,0" T="1" /></S><D><DS X="400" Y="370" /></D><O><O C="10" X="590" P="0" Y="145" /><O C="1" X="210" P="0" Y="145" /></O></Z></C>
N="light,id"
Effect: Sets the night mode game mode where mice can only see a small area around them. This is the effect seen in map 97.
Arguments:
- light (decimal) - The value to set the diameter for the light. Default is 150.
- id (integer) - The type of night mode. Default is 0.
Night mode types:
- 0 - Affects everyone
- 1 - Affects only the shaman
- 2 - Affects everyone except the shaman
Example: Activates night mode.
<C><P N="" /><Z><S><S X="400" L="400" Y="390" H="20" P="0,0,0.3,0.2,0,0,0,0" T="0" /></S><D><DS X="400" Y="370" /></D><O /></Z></C>
P=""
Effect: Allows the shaman to spawn portals on the map.
Arguments:
- None.
Example: Activates portals. The shaman can now spawn portals on the map.
<C><P P="" /><Z><S><S X="400" L="400" Y="390" H="20" P="0,0,0.3,0.2,0,0,0,0" T="0" /></S><D><DS X="400" Y="370" /></D><O /></Z></C>
shaman_tools="id1,id2"
Effect: Sets which objects the shaman can spawn on the map.
Arguments:
- id1 (integer) - The ID of the first shaman object. A comprehensive list may be found here.
- id2 (integer) - The ID of the second shaman object.
Notes:
- Multiple different id arguments split by a "," may be specified to display as many shaman objects as desired.
- This tag does not work if the conju="" tag is used.
Example: The shaman can only spawn balls (ID 6), large boxes (ID 2) and long planks (ID 4) on the map.
<C><P shaman_tools="6,2,4" /><Z><S><S X="400" L="400" Y="390" H="20" P="0,0,0.3,0.2,0,0,0,0" T="0" /></S><D><DS X="400" Y="370" /></D><O /></Z></C>
theme="halloween"
Effect: Sets the dodue cheese to the Halloween theme.
Arguments:
- halloween
Notes:
- Using this tag without the dodue="" tag results in the normal cheese being invisible on the map.
Example: Activates Halloween dodue for the map.
<C><P theme="halloween" dodue="" /><Z><S><S H="20" P="0,0,0.3,0.2,0,0,0,0" L="400" X="400" Y="390" T="0" /></S><D><DS Y="370" X="400" /><F Y="360" X="250" /><F Y="360" X="350" /><F Y="360" X="450" /><F Y="360" X="550" /></D><O /></Z></C>
Grounds
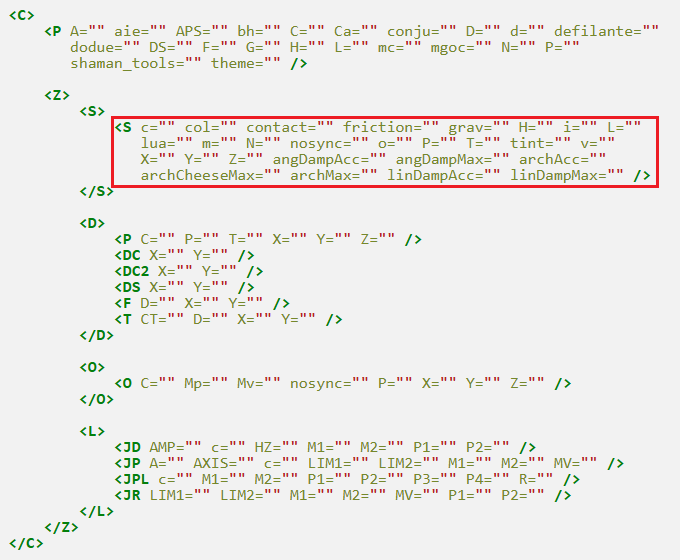
Location of the tag highlighted
<S /> tag
These tags go into <S /> tag(s) inside the <S> </S> container tag. They specify ground properties and settings.
c="value"
Effect: Sets the collision type of the ground.
Arguments:
- value (integer) - The mode of ground collision.
Collision types:
- 1 - Collision with all objects
- 2 - Collision with shaman objects and grounds
- 3 - Collision with shaman and mice
- 4 - No collision with any objects
Example: Sets the wood ground's collision so that it only collides with shaman and mice, so the ball falls through it.
<C><P /><Z><S><S X="400" L="400" Y="390" c="3" H="20" P="0,0,0.3,0.2,0,0,0,0" T="0" /></S><D><DS X="400" Y="370" /></D><O><O C="6" X="605" P="0" Y="200" /></O></Z></C>
col=""
Effect: Activates touch collision (collision with mice when the ground is touched).
Arguments:
- None.
Example: Activates touch collision for the longer ground, this can be seen by spawning mice by pressing the M key.
<C><P /><Z><S><S H="30" P="0,0,0.3,0.2,0,0,0,0" L="100" X="500" Y="365" T="0" /><S H="20" P="0,0,0.3,0.2,0,0,0,0" L="400" X="400" Y="390" T="0" col="" /></S><D><DS Y="370" X="400" /></D><O /></Z></C>
contact="id"
Effect: For Lua event eventContactListener. Event is called when a mouse collides with the ground.
Arguments:
- id (integer) - The ID of the ground, to identify it in Lua.
Example: Identifies the ground as "5" in Lua.
<C><P /><Z><S><S X="400" L="400" Y="390" H="20" P="0,0,0.3,0.2,0,0,0,0" T="0" contact="5" /></S><D><DS X="400" Y="370" /></D><O /></Z></C>
friction="f,l"
Effect: Gives the mouse a temporary friction effect when touching the ground.
Arguments:
- f (decimal) - Strength of the effect (positive = sticky
 , negative = slippery
  ).
).
- Grounds touched by the player will have an effective friction of:
- base_friction × strength × 5
- base_friction − strength
- l (decimal) - Amount the effect strength decreases per second.
- A value of 0 means the effect will not fade away.
- Must be negative if the strength is negative.
Notes:
- Touching water or web removes the effect immediately.
Example: The mouse gets its friction multiplied by 100 (20×5) after touching the ice ground and after moving off it, the effect strength goes down by 2 per second so the effect lasts 10 seconds (20/2).
<C><P /><Z><S><S P="0,0,0.3,0.2,0,0,0,0" L="20" H="30" X="500" Y="365" T="1" friction="20,2" /><S P="0,0,0.3,0.2,0,0,0,0" L="400" H="20" X="400" Y="390" T="0" /></S><D><DS Y="370" X="400" /></D><O /></Z></C>
Example: Make a chocolate ground (20 friction) feel like grass/wood (0.3 friction).
- friction="-19.7,-3.94" (−19.7 friction for 5 seconds)
grav="value"
Effect: Sets the gravity of a dynamic ground.
Arguments:
- value (decimal) - The gravity of the dynamic ground. Default is 1. It can be negative.
Example: Makes a dynamic ice ground with -1 gravity.
<C><P /><Z><S><S H="20" P="0,0,0.3,0.2,0,0,0,0" L="400" X="400" Y="390" T="0" /><S H="50" P="1,0,0,0.2,0,0,0,0" L="50" X="500" Y="300" T="1" grav="-1" /></S><D><DS Y="370" X="400" /></D><O /></Z></C>
H="value"
Effect: Sets the ground's height.
Arguments:
- value (decimal) - The height of the ground, given in pixels. Minimum is 10.
Example: Makes the ground 20px high.
<C><P /><Z><S><S X="400" L="400" Y="390" H="20" P="0,0,0.3,0.2,0,0,0,0" T="0" /></S><D><DS X="400" Y="370" /></D><O /></Z></C>
i="x,y,url"
Effect: Places an image on the ground.
Arguments:
- x (coordinate) - The x location of the image.
- y (coordinate) - The y location of the image.
- url (coordinate) - The url of the image to display.
Notes:
- This feature is only available to maps loaded in Lua by members of the Module Team.
Example: Places an image on the middle of the ground.
<C><P /><Z><S><S X="400" L="400" Y="390" H="20" P="0,0,0.3,0.2,0,0,0,0" T="0" i="400,390,http://derpolino.alwaysdata.net/imagetfm/?id=4663#images/x_transformice/x_inventaire/" /></S><D><DS X="400" Y="370" /></D><O /></Z></C>
L="value"
Effect: Sets the ground's length.
Arguments:
- value (decimal) - The length of the ground, given in pixels. Minimum is 10.
Example: Makes the ground 400px long.
<C><P /><Z><S><S X="400" L="400" Y="390" H="20" P="0,0,0.3,0.2,0,0,0,0" T="0" /></S><D><DS X="400" Y="370" /></D><O /></Z></C>
lua="id"
Effect: Identifies a ground in Lua.
Arguments:
- id (integer) - The ID of the ground, to identify it in Lua.
Example: Identifies the ground as "5" in Lua.
<C><P /><Z><S><S X="400" L="400" Y="390" H="20" P="0,0,0.3,0.2,0,0,0,0" T="0" lua="5" /></S><D><DS X="400" Y="370" /></D><O /></Z></C>
m=""
Effect: Makes the ground invisible.
Arguments:
- None.
Example: Makes the second wood ground invisible. When the map is validated, it will be invisible.
<C><P /><Z><S><S X="400" L="400" Y="390" H="20" P="0,0,0.3,0.2,0,0,0,0" T="0" /><S X="500" L="20" Y="365" H="30" P="0,0,0.3,0.2,0,0,0,0" T="0" m="" /></S><D><DS X="400" Y="370" /></D><O /></Z></C>
N=""
Effect: Makes the ground display in the foreground.
Arguments:
- None.
Example: Makes the second wood ground appear in the foreground. Mice will appear to be behind it, this can be tested by running against the ground.
<C><P /><Z><S><S X="400" L="400" Y="390" H="20" P="0,0,0.3,0.2,0,0,0,0" T="0" /><S X="500" L="20" Y="365" H="30" P="0,0,0.3,0.2,0,0,0,0" T="0" N="" /></S><D><DS X="400" Y="370" /></D><O /></Z></C>
nosync=""
Effect: Disables the ground synchronization on dynamic grounds, so that it does not need to be tied to the room sync.
Arguments:
- None.
Example: Deactivates the ground sync. This cannot be visibly viewed in the editor.
<C><P /><Z><S><S X="400" L="400" Y="390" H="20" P="0,0,0.3,0.2,0,0,0,0" T="0" /><S X="500" L="20" Y="200" H="30" P="1,0,0.3,0.2,0,0,0,0" T="1" nosync="" /></S><D><DS X="400" Y="370" /></D><O /></Z></C>
o="color"
Effect: Colors the ground (if it's the rectangle or circle type).
Arguments:
- color (hex) - The hex code of the ground's color.
Example: Colors the second ground red.
<C><P /><Z><S><S X="400" L="400" Y="390" H="20" P="0,0,0.3,0.2,0,0,0,0" T="0" /><S X="500" o="ff0000" L="20" Y="365" H="30" P="0,0,0.3,0.2,0,0,0,0" T="12" /></S><D><DS X="400" Y="370" /></D><O /></Z></C>
P="isdyn,mass,friction,restit,angle,fixrotat,lindamp,angdamp"
Effect: Sets the ground's physical properties.
Arguments:
- isdyn (boolean) - If 0, the ground is non dynamic. If 1, the ground is dynamic (moves and can interact actively with other objects)
- mass (decimal) - Mass of the ground. Acts only on dynamic grounds. Extremely low masses can make the ground easier for the mice to fall through it, higher masses make it have more inertia and make it harder to move. Negative mass will make the ground static.
- friction (decimal) - Friction of the ground. Low friction makes the ground slippery, higher friction makes it easier to grip.
- restit (decimal) - Restitution of the ground. The higher this is, the more the ground will push mice and objects away when they collide with it.
- angle (decimal) - Angle the ground is rotated to.
- fixrotat (boolean) - Fixed rotation. Acts only on dynamic grounds. If 0, the ground is free to rotate. If 1, the ground cannot rotate.
- lindamp (decimal) - Linear damping. Acts only on dynamic grounds. As this value increases, it becomes harder to move the ground.
- angdamp (decimal) - Angular damping. Acts only on dynamic grounds. As this value increases, it becomes harder to rotate the ground.
Example: Sets the properties of the second wood ground. It is dynamic, and the high damping makes it fall slowly, and the restitution makes mice "bounce" off it.
<C><P /><Z><S><S X="400" L="400" Y="390" H="20" P="0,0,0.3,0.2,0,0,0,0" T="0" /><S X="500" L="20" Y="300" H="30" P="1,0,0.3,2,0,0,20,0" T="0" /></S><D><DS X="400" Y="370" /></D><O /></Z></C>
T="id"
Effect: Sets the ground skin.
Arguments:
- id (integer) - The ID of the ground skin to display. A list of ground IDs can be found in the IDs section.
Example: Displays the wood ground, ID 0.
<C><P /><Z><S><S X="400" L="400" Y="390" H="20" P="0,0,0.3,0.2,0,0,0,0" T="0" /></S><D><DS X="400" Y="370" /></D><O /></Z></C>
tint="color"
Effect: Colors the ground.
Arguments:
- color (hex) - The hex code of the ground's color.
Notes:
- Rectangle and circle grounds must use the o="color" tag or they will be invisible.
Example: Colors the wood ground red.
<C><P /><Z><S><S X="400" L="400" Y="390" H="20" P="0,0,0.3,0.2,0,0,0,0" T="0" tint="ff0000" /></S><D><DS X="400" Y="370" /></D><O /></Z></C>
v="time"
Effect: Sets the time which the ground disappears at.
Arguments:
- time (integer) - The time for the ground to disappear, in milliseconds. 1 second is 1000 milliseconds.
Example: The second ground disappears after 5 seconds.
<C><P /><Z><S><S X="400" L="400" Y="390" H="20" P="0,0,0.3,0.2,0,0,0,0" T="0" /><S X="500" v="05000" L="20" Y="365" H="30" P="0,0,0.3,0.2,0,0,0,0" T="0" /></S><D><DS X="400" Y="370" /></D><O /></Z></C>
X="x"
Effect: Sets the x coordinate of the ground.
Arguments:
- x (coordinate) - The x coordinate of the ground.
Example: Places the ground at X, 400.
<C><P /><Z><S><S X="400" L="400" Y="390" H="20" P="0,0,0.3,0.2,0,0,0,0" T="0" /><S X="500" L="20" Y="365" H="30" P="0,0,0.3,0.2,0,0,0,0" T="0" /></S><D><DS X="400" Y="370" /></D><O /></Z></C>
Y="y"
Effect: Sets the y coordinate of the ground.
Arguments:
- y (coordinate) - The y coordinate of the ground.
Example: Places the ground at Y, 390.
<C><P /><Z><S><S X="400" L="400" Y="390" H="20" P="0,0,0.3,0.2,0,0,0,0" T="0" /><S X="500" L="20" Y="365" H="30" P="0,0,0.3,0.2,0,0,0,0" T="0" /></S><D><DS X="400" Y="370" /></D><O /></Z></C>
Z="id"
Effect: An ID to identify the Z index of the ground.
Arguments:
- id (coordinate) - The Z index to identify the ground.
Example: Identifies the ground as Z="0".
<C><P /><Z><S><S X="400" L="400" Y="390" Z="0" H="20" P="0,0,0.3,0.2,0,0,0,0" T="0" /><S X="500" L="20" Y="365" H="30" P="0,0,0.3,0.2,0,0,0,0" T="0" /></S><D><DS X="400" Y="370" /></D><O /></Z></C>
Water ground
<S /> tag
These tags go into <S /> tag(s) inside the <S> </S> container tag. They specify properties and settings for only the water ground.
angDampAcc="value"
Effect: Sets the angular damping acceleration (the higher the slower) (must use angDampMax as well).
Arguments:
- value (decimal) - The angular damping: acceleration of the water ground. Default is 0. A value of Infinity can be used.
angDampMax="value"
Effect: Sets the maximum angular damping (must use angDampAcc as well).
Arguments:
- value (decimal) - The angular damping: maximum speed of the water ground. Default is 0. A value of Infinity can be used.
archAcc="value"
Effect: Sets the acceleration power with which the mouse is pushed upward (the higher the faster) (must use archMax as well).
Arguments:
- value (decimal) - The acceleration of the water ground. Default is 0.1.
archCheeseMax="value"
Effect: Sets the acceleration power with which the mouse is pushed upward when it carries cheese.
Arguments:
- value (decimal) - The maximum speed of the water ground with cheese. Default is 0.25.
archMax="value"
Effect: Sets the maximum power (it seems this value only applies to archAcc, meaning it doesn't affect archCheeseMax) (must use archAcc as well).
Arguments:
- value (decimal) - The maximum speed of the water ground. Default is 0.5.
linDampAcc="value"
Effect: Sets the linear damping acceleration (the higher the slower) (must use linDampMax as well).
Arguments:
- value (decimal) - The linear damping: acceleration of the water ground. Default is 0. A value of Infinity can be used.
linDampMax="value"
Effect: Sets the maximum linear damping (must use linDampAcc as well).
Arguments:
- value (decimal) - The linear damping: maximum speed of the water ground. Default is 0. A value of Infinity can be used.
Example: Makes an invisible water ground with altered water physics.
<C><P /><Z><S><S P="0,0,0,0,0,0,0,0" H="200" T="9" L="400" X="400" Y="300" m="" angDampAcc="10" angDampMax="10" archAcc="1" archCheeseMax="3" archMax="5" linDampAcc="10" linDampMax="10" /><S P="0,0,0.3,0.2,0,0,0,0" L="800" H="50" X="400" Y="375" T="0" /></S><D><F Y="340" X="700" /><DS Y="330" X="100" /></D><O /><L /></Z></C>
Decorations and mouse objects

Location of the tag highlighted
These tags go into the <D> </D> container tag. They specify decorations, mouse spawns, the mouse hole and cheese.
Decorations
<P /> tag
These tags go into the <P /> tag (within the <D></D> tags) and specify the properties of the decoration.
C="c1,c2,c3,c4"
Effect: Sets the decoration colors.
Arguments:
- c1 (hex) - The first color of the decoration.
- c2 (hex) - The second color of the decoration.
- c3 (hex) - The third color of the decoration.
- c4 (hex) - The fourth color of the decoration.
Notes:
- Some decorations may only have one, two or three color arguments, or even none.
Example: Colors the decoration.
<C><P /><Z><S><S X="400" L="400" Y="390" H="20" P="0,0,0.3,0.2,0,0,0,0" T="0" /></S><D><DS X="400" Y="370" /><P C="18585,c26900,10a61d,a3468e" X="500" P="0,0" T="93" Y="380" /></D><O /></Z></C>
P="fore,invert"
Effect: Sets the decoration's appearance.
Arguments:
- fore (boolean) - If the decoration is to appear in the background or not. A value of 0 makes it appear in the background, a value of 1 will make it foreground.
- invert (boolean) - If the decoration is to be inverted. A value of 0 means the background displays as default, a value of 1 inverts (flips) the background along the X axis (horizontal).
Example: Displays the decoration as background and inverted.
<C><P /><Z><S><S X="400" L="400" Y="390" H="20" P="0,0,0.3,0.2,0,0,0,0" T="0" /></S><D><DS X="400" Y="370" /><P X="500" P="0,1" T="6" Y="380" /></D><O /></Z></C>
T="id"
Effect: Sets the decoration type.
Arguments:
- id (integer) - The ID of the decoration to display. A list of decoration IDs can be found here.
Example: Displays the sign decoration, ID 4.
<C><P /><Z><S><S X="400" L="400" Y="390" H="20" P="0,0,0.3,0.2,0,0,0,0" T="0" /></S><D><DS X="400" Y="370" /><P X="500" P="0,0" T="4" Y="380" /></D><O /></Z></C>
X="x"
Effect: Sets the x location of the decoration.
Arguments:
- x (coordinate) - The x coordinate of the decoration.
Example: Places the decoration at X, 500.
<C><P /><Z><S><S X="400" L="400" Y="390" H="20" P="0,0,0.3,0.2,0,0,0,0" T="0" /></S><D><DS X="400" Y="370" /><P X="500" P="0,0" T="4" Y="380" /></D><O /></Z></C>
Y="y"
Effect: Sets the y location of the decoration.
Arguments:
- y (coordinate) - The y coordinate of the decoration.
Example: Places the decoration at Y, 370.
<C><P /><Z><S><S X="400" L="400" Y="390" H="20" P="0,0,0.3,0.2,0,0,0,0" T="0" /></S><D><DS X="400" Y="370" /><P X="500" P="0,0" T="4" Y="380" /></D><O /></Z></C>
Z="id"
Effect: An ID to identify the Z index of the decoration.
Arguments:
- id (coordinate) - The Z index to identify the decoration.
Example: Identifies the decoration as Z="0".
<C><P /><Z><S><S X="400" L="400" Y="390" H="20" P="0,0,0.3,0.2,0,0,0,0" T="0" /></S><D><DS X="400" Y="370" /><P X="500" P="0,0" T="4" Y="380" Z="0" /></D><O /></Z></C>
Shaman spawn
<DC /> tag
These tags go into the <DC /> tag and specify the properties of the shaman spawn. This can only be placed once in the map.
X="x"
Effect: Sets the x location where the shaman will spawn.
Arguments:
- x (coordinate) - The x coordinate of the shaman spawn.
Example: Makes the shaman spawn at X, 400.
<C><P /><Z><S><S X="400" L="400" Y="390" H="20" P="0,0,0.3,0.2,0,0,0,0" T="0" /></S><D><DS X="400" Y="370" /><DC X="400" Y="370" /></D><O /></Z></C>
Y="y"
Effect: Sets the y location where the shaman will spawn.
Arguments:
- y (coordinate) - The y coordinate of the shaman spawn.
Example: Makes the shaman spawn at Y, 370.
<C><P /><Z><S><S X="400" L="400" Y="390" H="20" P="0,0,0.3,0.2,0,0,0,0" T="0" /></S><D><DS X="400" Y="370" /><DC X="400" Y="370" /></D><O /></Z></C>
Dual shaman spawn
<DC2 /> tag
These tags go into the <DC2 /> tag and specify the properties of the dual shaman spawn. This can only be placed once in the map.
X="x"
Effect: Sets the x location where the second shaman will spawn.
Arguments:
- x (coordinate) - The x coordinate of the second shaman spawn.
Example: Makes the second shaman spawn at X, 400.
<C><P /><Z><S><S X="400" L="400" Y="390" H="20" P="0,0,0.3,0.2,0,0,0,0" T="0" /></S><D><DS X="400" Y="370" /><DC2 X="400" Y="370" /></D><O /></Z></C>
Y="y"
Effect: Sets the y location where the second shaman will spawn.
Arguments:
- y (coordinate) - The y coordinate of the second shaman spawn.
Example: Makes the second shaman spawn at Y, 370.
<C><P /><Z><S><S X="400" L="400" Y="390" H="20" P="0,0,0.3,0.2,0,0,0,0" T="0" /></S><D><DS X="400" Y="370" /><DC2 X="400" Y="370" /></D><O /></Z></C>
Mouse spawn
<DS /> tag
These tags go into the <DS /> tag and specify the properties of the mouse spawn. The locations provided in this spawn overrides the coordinates provided in the DS="mode;x,y" tag in <P />. In addition, this can only be placed once on the map.
X="x"
Effect: Sets the x location where the mice spawn.
Arguments:
- x (coordinate) - The x coordinate of the mouse spawn.
Example: Makes the mice spawn at X, 400.
<C><P /><Z><S><S X="400" L="400" Y="390" H="20" P="0,0,0.3,0.2,0,0,0,0" T="0" /></S><D><DS X="400" Y="370" /></D><O /></Z></C>
Y="y"
Effect: Sets the y location where mice spawn.
Arguments:
- y (coordinate) - The y coordinate of the mouse spawn.
Example: Makes the mice spawn at Y, 370.
<C><P /><Z><S><S X="400" L="400" Y="390" H="20" P="0,0,0.3,0.2,0,0,0,0" T="0" /></S><D><DS X="400" Y="370" /></D><O /></Z></C>
Cheese
<F /> tag
These tags go into the <F /> tag and specify the properties of the cheese.
D=""
Effect: Makes the cheese display in the foreground.
Arguments:
- None.
Example: Makes the cheese appear in the foreground. Mice will appear to be behind it.
<C><P /><Z><S><S X="400" L="400" Y="390" H="20" P="0,0,0.3,0.2,0,0,0,0" T="0" /></S><D><DS X="400" Y="370" /><F X="400" Y="300" D="" /></D><O /></Z></C>
X="x"
Effect: Sets the x location of the cheese.
Arguments:
- x (coordinate) - The x coordinate of the cheese.
Example: Places the cheese at X, 400.
<C><P /><Z><S><S X="400" L="400" Y="390" H="20" P="0,0,0.3,0.2,0,0,0,0" T="0" /></S><D><DS X="400" Y="370" /><F X="400" Y="300" /></D><O /></Z></C>
Y="y"
Effect: Sets the y location of the cheese.
Arguments:
- y (coordinate) - The y coordinate of the cheese.
Example: Places the cheese at Y, 300.
<C><P /><Z><S><S X="400" L="400" Y="390" H="20" P="0,0,0.3,0.2,0,0,0,0" T="0" /></S><D><DS X="400" Y="370" /><F X="400" Y="300" /></D><O /></Z></C>
Mouse hole
<T /> tag
These tags go into the <T /> tag and specify the properties of the mouse hole.
CT="value"
Effect: Sets the dual shaman mouse hole color.
Arguments:
- value (integer) - The type of mouse hole.
Mouse hole types:
- 1 - Blue mouse hole
- 2 - Pink mouse hole
Example: Places the blue mouse hole at x: 300 y: 300 and the pink mouse hole at x: 500 y: 300.
<C><P /><Z><S><S P="0,0,0.3,0.2,0,0,0,0" L="400" H="20" X="400" Y="390" T="0" /></S><D><DS Y="370" X="400" /><T X="300" Y="300" CT="1" /><T X="500" Y="300" CT="2" /></D><O /></Z></C>
D=""
Effect: Makes the mouse hole display in the foreground.
Arguments:
- None.
Example: Makes the mouse hole appear in the foreground. Grounds will appear to be behind it, but mice will not.
<C><P /><Z><S><S H="20" P="0,0,0.3,0.2,0,0,0,0" L="400" X="400" Y="390" T="0" /><S H="50" P="0,0,0.3,0.2,0,0,0,0" L="50" X="430" Y="280" T="0" /></S><D><DS Y="370" X="400" /><T X="400" Y="300" D="" /></D><O /></Z></C>
X="x"
Effect: Sets the x location of the mouse hole.
Arguments:
- x (coordinate) - The x coordinate of the mouse hole.
Example: Places the mouse hole at X, 400.
<C><P /><Z><S><S X="400" L="400" Y="390" H="20" P="0,0,0.3,0.2,0,0,0,0" T="0" /></S><D><DS X="400" Y="370" /><T X="400" Y="300" /></D><O /></Z></C>
Y="y"
Effect: Sets the y location of the mouse hole.
Arguments:
- y (coordinate) - The y coordinate of the mouse hole.
Example: Places the mouse hole at Y, 370.
<C><P /><Z><S><S X="400" L="400" Y="390" H="20" P="0,0,0.3,0.2,0,0,0,0" T="0" /></S><D><DS X="400" Y="370" /><T X="400" Y="370" /></D><O /></Z></C>
Shaman objects
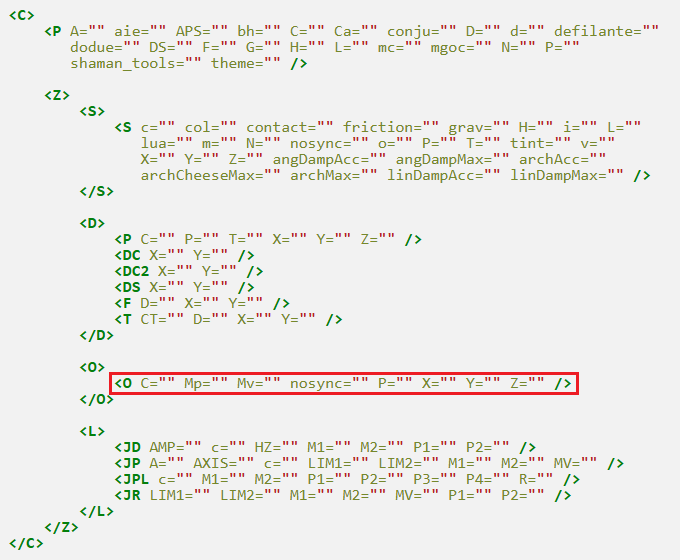
Location of the tag highlighted
<O /> tag
These tags go into <O /> tag(s) inside the <O> </O> container tag. They specify shaman objects and properties they may have.
C="id"
Effect: Sets the type of shaman object.
Arguments:
- id (integer) - The ID of the shaman object to set. A comprehensive list may be found here.
Example: Places a large box, ID 2.
<C><P /><Z><S><S L="400" H="20" X="400" Y="390" T="0" P="0,0,0.3,0.2,0,0,0,0" /></S><D><DS Y="370" X="400" /></D><O><O C="2" Y="350" P="0" X="500" /></O></Z></C>
Mp="power"
Effect: Sets nail rotation power. Only applies to red and blue nails (IDs 11 to 16).
Arguments:
- power (integer) - The power level. Low values will make the motor nail easily backdrivable whereas higher values make it more stable. A value of Infinity makes it fully stable.
Example: Makes the nailed plank rotate with infinite power, making it fully stable.
<C><P /><Z><S><S L="400" X="400" H="20" Y="390" T="0" P="0,0,0.3,0.2,0,0,0,0" /></S><D><DS Y="370" X="400" /></D><O><O C="3" Y="300" X="500" P="0" /><O Mv="-20" Mp="Infinity" X="500" C="11" Y="300" P="0" /></O></Z></C>
Mv="speed"
Effect: Sets nail rotation speed. Only applies to red and blue nails (IDs 11 to 16).
Arguments:
- speed (integer) - The speed of rotation. A positive value will create anticlockwise rotation whereas negative will create clockwise.
Example: Makes the nailed plank rotate with a speed of 20 in the clockwise direction.
<C><P /><Z><S><S L="400" X="400" H="20" Y="390" T="0" P="0,0,0.3,0.2,0,0,0,0" /></S><D><DS Y="370" X="400" /></D><O><O C="3" Y="300" X="500" P="0" /><O Mv="-20" Mp="Infinity" X="500" C="11" Y="300" P="0" /></O></Z></C>
nosync=""
Effect: Disables the shaman object synchronization, so that it does not need to be tied to the room sync.
Arguments:
- None.
Example: Deactivates the shaman object sync. This cannot be visibly viewed in the editor.
<C><P /><Z><S><S L="400" H="20" X="400" Y="390" T="0" P="0,0,0.3,0.2,0,0,0,0" /></S><D><DS Y="370" X="400" /></D><O><O C="2" Y="350" P="0" nosync="" X="500"/></O></Z></C>
P="angle,collision"
Effect: Sets the properties of the shaman object.
Arguments:
- angle (integer) - Angle of the shaman object.
- collision (boolean) - If the object is to collide with mice or not. 0 for collision and 1 for no collision. It will appear ghosted if there is no collision.
Example: Sets the angle of the box to 45 degrees and deactivates mice collision.
<C><P /><Z><S><S L="400" X="400" H="20" Y="390" T="0" P="0,0,0.3,0.2,0,0,0,0" /></S><D><DS Y="370" X="400" /></D><O><O C="2" Y="340" X="500" P="45,1" /></O></Z></C>
X="x"
Effect: Sets the x coordinate of the shaman object.
Arguments:
- x (coordinate) - The x coordinate of the shaman object.
Example: Places the large box at X, 500.
<C><P /><Z><S><S L="400" H="20" X="400" Y="390" T="0" P="0,0,0.3,0.2,0,0,0,0" /></S><D><DS Y="370" X="400" /></D><O><O C="2" Y="350" P="0" X="500" /></O></Z></C>
Y="y"
Effect: Sets the y coordinate of the shaman object.
Arguments:
- y (coordinate) - The y coordinate of the shaman object.
Example: Places the large box at Y, 350.
<C><P /><Z><S><S L="400" H="20" X="400" Y="390" T="0" P="0,0,0.3,0.2,0,0,0,0" /></S><D><DS Y="370" X="400" /></D><O><O C="2" Y="350" P="0" X="500" /></O></Z></C>
Z="id"
Effect: An ID to identify the Z index of the shaman object.
Arguments:
- id (coordinate) - The Z index to identify the shaman object.
Example: Identifies the large box as Z="0".
<C><P /><Z><S><S L="400" H="20" X="400" Y="390" T="0" P="0,0,0.3,0.2,0,0,0,0" /></S><D><DS Y="370" X="400" /></D><O><O C="2" Z="0" Y="350" P="0" X="500" /></O></Z></C>
Joints
Location of the tag highlighted
<L /> tag
These tags go into the <L> </L> container tag. They specify the various different types of joints and their properties.
Distance joint
<JD /> tag
These tags go into the <JD /> tag and specify the properties of the distance joint.
AMP="value"
Effect: Sets the joint elasticity.
Arguments:
- value (int) - How elastic the joint is to be.
Notes:
- If the tag is used without the HZ tag, the tag has no effect.
- If the tag is used with the HZ tag, a high value will mean a slower retract, whereas lower values will cause a quicker retract.
Example: Makes the joint retract slowly after extending.
<C><P /><Z><S><S L="400" X="400" H="20" Y="390" T="0" P="0,0,0.3,0.2,0,0,0,0" /><S L="40" X="500" H="40" Y="320" T="16" P="1,0,0.3,0.2,0,1,0,0" /></S><D><DS Y="370" X="400" /></D><O><O C="17" Y="220" X="500" P="180" /></O><L><JD AMP="2e3" HZ="100" M2="0" M1="1" c="00000,2,.5" P2="500,100" /></L></Z></C>
c="color,thickness,alpha,appearance"
Effect: Sets the joint color and appearance.
Arguments:
- color (hex) - A hex color code to set the color of the joint.
- thickness (int) - Any value from 0 to 255, specifying the thickness of the joint.
- alpha (decimal) - Any value from 1 to 0, which gives the alpha/transparency of the joint.
- appearance (boolean) - How the joint should appear. 1 will make it foreground, 0 will make it background.
Example: Displays the joint with color #000000, 2 thickness, 50% alpha, and in the background.
<C><P /><Z><S><S L="400" X="400" H="20" Y="390" T="0" P="0,0,0.3,0.2,0,0,0,0" /><S L="40" X="500" H="40" Y="320" T="16" P="1,0,0.3,0.2,0,1,0,0" /></S><D><DS Y="370" X="400" /></D><O /><L><JD M2="0" M1="1" c="00000,2,.5,0" P2="500,100" /></L></Z></C>
HZ="value"
Effect: Sets the joint damping.
Arguments:
- value (int) - The joint damping, or tautness. Higher values means the joint is more difficult to extend, lower values will extend further and retract slower.
Notes:
- See the AMP tag.
Example: Causes the joint to be damped so that it retracts quickly and is difficult to extend.
<C><P /><Z><S><S L="400" H="20" X="400" Y="390" T="0" P="0,0,0.3,0.2,0,0,0,0" /><S L="40" H="40" X="500" Y="320" T="16" P="1,0,0.3,0.2,0,1,0,0" /></S><D><DS Y="370" X="400" /></D><O><O C="17" Y="220" P="180" X="500" /></O><L><JD c="00000,2,.5" P2="500,100" M2="0" HZ="100" M1="1" /></L></Z></C>
M1="z"
Effect: Sets the first ground to link to.
Arguments:
- z (integer) - The Z index of the first ground to link to.
Example: Links the ground Z index 1.
<C><P /><Z><S><S L="400" X="400" H="20" Y="390" T="0" P="0,0,0.3,0.2,0,0,0,0" /><S L="40" X="500" H="40" Y="320" T="16" P="1,0,0.3,0.2,0,1,0,0" /><S L="40" H="40" X="500" Y="100" T="0" P="0,0,0.3,0.2,0,0,0,0" /></S><D><DS Y="370" X="400" /></D><O /><L><JD M2="2" c="00000,2,.5,0" M1="1" /></L></Z></C>
M2="z"
Effect: Sets the second ground to link to.
Arguments:
- z (integer) - The Z index of the second ground to link to.
Example: Links the ground Z index 2.
<C><P /><Z><S><S L="400" X="400" H="20" Y="390" T="0" P="0,0,0.3,0.2,0,0,0,0" /><S L="40" X="500" H="40" Y="320" T="16" P="1,0,0.3,0.2,0,1,0,0" /><S L="40" H="40" X="500" Y="100" T="0" P="0,0,0.3,0.2,0,0,0,0" /></S><D><DS Y="370" X="400" /></D><O /><L><JD M2="2" c="00000,2,.5,0" M1="1" /></L></Z></C>
P1="x,y"
Effect: Sets the coordinates on the map where the first ground is to be linked.
Arguments:
- x (coordinate) - The x coordinate where the joint is to be linked to the first ground.
- y (coordinate) - The y coordinate where the joint is to be linked to the first ground.
Example: Links the ground Z index 1 at x: 200 y: 320.
<C><P /><Z><S><S L="400" X="400" H="20" Y="390" T="0" P="0,0,0.3,0.2,0,0,0,0" /><S L="40" X="500" H="40" Y="320" T="16" P="1,0,0.3,0.2,0,1,0,0" /><S L="40" H="40" X="500" Y="100" T="0" P="0,0,0.3,0.2,0,0,0,0" /></S><D><DS Y="370" X="400" /></D><O /><L><JD P1="200,320" M2="2" c="00000,2,.5,0" M1="1" /></L></Z></C>
P2="x,y"
Effect: Sets the coordinates on the map where the second ground is to be linked.
Arguments:
- x (coordinate) - The x coordinate where the joint is to be linked to the second ground.
- y (coordinate) - The y coordinate where the joint is to be linked to the second ground.
Example: Links the ground Z index 1 at x: 200 y: 100.
<C><P /><Z><S><S L="400" X="400" H="20" Y="390" T="0" P="0,0,0.3,0.2,0,0,0,0" /><S L="40" X="500" H="40" Y="320" T="16" P="1,0,0.3,0.2,0,1,0,0" /><S L="40" H="40" X="500" Y="100" T="0" P="0,0,0.3,0.2,0,0,0,0" /></S><D><DS Y="370" X="400" /></D><O /><L><JD P2="200,100" M2="2" c="00000,2,.5,0" M1="1" /></L></Z></C>
Prismatic joint
<JP /> tag
These tags go into the <JP /> tag and specify the properties of the prismatic joint.
A="angle"
Effect: Sets the rotation angle between the two linked grounds.
Arguments:
- angle (radians) - The angle to set between the two grounds. If not specified this forces the grounds to be locked to the same rotation.
Example: Sets the angle between the two grounds to 60 degrees (1.0472 radians) as per the angle of the lower ground.
<C><P /><Z><S><S L="400" X="400" H="20" Y="390" T="16" P="1,-1,0.3,0.2,0,0,0,0" /><S L="40" X="500" H="40" Y="100" T="16" P="0,0,0.3,0.2,0,0,0,0" /><S L="40" H="40" X="500" Y="320" T="16" P="1,0,0.3,0.2,60,0,0,0" /></S><D><DS Y="370" X="400" /></D><O /><L><JP M2="2" A="1.0472" AXIS="1,0" M1="1" /></L></Z></C>
AXIS="isx,isy"
Effect: Sets the axis at which the two grounds will be linked.
Arguments:
- isx (boolean) - If the grounds are to be linked along the x axis (horizontally). A value of 1 specifies the grounds will move together horizontally.
- isy (boolean) - If the grounds are to be linked along the y axis (vertically). A value of 1 specifies the grounds will move together vertically.
Notes:
- Without this tag, the JP joint will not have any effect.
- Only one of the isx, isy arguments must be true (value of 1), the other must be false (value of 0). Otherwise the joint has no effect.
Example: Links the grounds together so they are free to move horizontally, however their vertical movement is tied to one another.
<C><P /><Z><S><S L="400" H="20" X="400" Y="390" T="16" P="1,-1,0.3,0.2,0,0,0,0" /><S L="40" H="40" X="500" Y="100" T="16" P="0,0,0.3,0.2,0,0,0,0" /><S L="40" X="500" H="40" Y="320" T="16" P="1,0,0.3,0.2,0,1,0,0" /></S><D><DS Y="370" X="400" /></D><O /><L><JP M2="2" AXIS="1,0" M1="1" /></L></Z></C>
c="color,thickness,alpha,appearance"
Effect: Sets the joint color and appearance.
Arguments:
- color (hex) - A hex color code to set the color of the joint.
- thickness (int) - Any value from 0 to 255, specifying the thickness of the joint.
- alpha (decimal) - Any value from 1 to 0, which gives the alpha/transparency of the joint.
- appearance (boolean) - How the joint should appear. 1 will make it foreground, 0 will make it background.
Example: Displays the joint with color #000000, 2 thickness, 50% alpha, and in the background.
<C><P /><Z><S><S L="400" X="400" H="20" Y="390" T="16" P="1,-1,0.3,0.2,0,0,0,0" /><S L="40" X="500" H="40" Y="100" T="16" P="0,0,0.3,0.2,0,0,0,0" /><S L="40" H="40" X="500" Y="320" T="16" P="1,0,0.3,0.2,60,0,0,0" /></S><D><DS Y="370" X="400" /></D><O /><L><JP M2="2" A="1.0472" AXIS="1,0" M1="1" c="00000,2,.5,0" P2="500,100" /></L></Z></C>
LIM1="value"
Effect: Sets the joint's lower limit of movement (leftwards or upwards).
Arguments:
- value (decimal) - The lower limit of movement. 1 = 30px. Should always be negative, as it's a backwards limit.
Example: Limits the ground movement to 90px in the left direction. If the AXIS was in the opposite direction this would be in the upwards direction.
<C><P /><Z><S><S L="400" H="20" X="400" Y="390" T="16" P="1,-1,0.3,0.2,0,0,0,0" /><S L="40" H="40" X="500" Y="100" T="16" P="0,0,0.3,0.2,0,0,0,0" /><S L="40" X="500" H="40" Y="320" T="16" P="1,0,0.3,0.2,0,1,0,0" /></S><D><DS Y="370" X="400" /></D><O /><L><JP M2="2" AXIS="1,0" LIM1="-3" M1="1" /></L></Z></C>
LIM2="value"
Effect: Sets the joint's upper limit of movement (rightwards or downwards).
Arguments:
- value (decimal) - The upper limit of movement. 1 = 30px. Should always be positive, as it's a forwards limit.
Example: Limits the ground movement to 90px in the right direction. If the AXIS was in the opposite direction this would be in the downward direction.
<C><P /><Z><S><S L="400" H="20" X="400" Y="390" T="16" P="1,-1,0.3,0.2,0,0,0,0" /><S L="40" H="40" X="500" Y="100" T="16" P="0,0,0.3,0.2,0,0,0,0" /><S L="40" X="500" H="40" Y="320" T="16" P="1,0,0.3,0.2,0,1,0,0" /></S><D><DS Y="370" X="400" /></D><O /><L><JP M2="2" AXIS="1,0" LIM2="3" M1="1" /></L></Z></C>
M1="z"
Effect: Sets the first ground to link to.
Arguments:
- z (integer) - The Z index of the first ground to link to.
Example: Links the ground Z index 1.
<C><P /><Z><S><S L="400" H="20" X="400" Y="390" T="16" P="1,-1,0.3,0.2,0,0,0,0" /><S L="40" H="40" X="500" Y="100" T="16" P="0,0,0.3,0.2,0,0,0,0" /><S L="40" X="500" H="40" Y="320" T="16" P="1,0,0.3,0.2,0,1,0,0" /></S><D><DS Y="370" X="400" /></D><O /><L><JP M2="2" AXIS="1,0" M1="1" /></L></Z></C>
M2="z"
Effect: Sets the second ground to link to.
Arguments:
- z (integer) - The Z index of the second ground to link to.
Example: Links the ground Z index 2.
<C><P /><Z><S><S L="400" H="20" X="400" Y="390" T="16" P="1,-1,0.3,0.2,0,0,0,0" /><S L="40" H="40" X="500" Y="100" T="16" P="0,0,0.3,0.2,0,0,0,0" /><S L="40" X="500" H="40" Y="320" T="16" P="1,0,0.3,0.2,0,1,0,0" /></S><D><DS Y="370" X="400" /></D><O /><L><JP M2="2" AXIS="1,0" M1="1" /></L></Z></C>
MV="power,speed"
Effect: Sets the ground motor power and speed.
Arguments:
- power (integer) - The power of the ground. Lower values allow for it to be backdriven whereas higher values make it harder to backdrive. For best stability a value of Infinity may be used.
- speed (integer) - The speed of the ground. If negative, the ground will go upwards or leftwards depending on the AXIS. If positive the ground will go rightwards or downwards, again depending on the AXIS.
Example: Powers the ground so that it moves to the right.
<C><P /><Z><S><S L="400" H="20" X="400" Y="390" T="16" P="1,-1,0.3,0.2,0,0,0,0" /><S L="40" H="40" X="500" Y="100" T="16" P="0,0,0.3,0.2,0,0,0,0" /><S L="40" X="500" H="40" Y="320" T="16" P="1,0,0.3,0.2,0,1,0,0" /></S><D><DS Y="370" X="400" /></D><O /><L><JP MV="Infinity,10" M2="2" AXIS="1,0" M1="1" /></L></Z></C>
Pulley joint
<JPL /> tag
These tags go into the <JPL /> tag and specify the properties of the pulley joint.
c="color,thickness,alpha,appearance"
Effect: Sets the joint color and appearance.
Arguments:
- color (hex) - A hex color code to set the color of the joint.
- thickness (int) - Any value from 0 to 255, specifying the thickness of the joint.
- alpha (decimal) - Any value from 1 to 0, which gives the alpha/transparency of the joint.
- appearance (boolean) - How the joint should appear. 1 will make it foreground, 0 will make it background.
Example: Displays the joint with color #000000, 2 thickness, 50% alpha, and in the background.
<C><P /><Z><S><S L="400" X="400" H="20" Y="390" T="0" P="0,0,0.3,0.2,0,0,0,0" /><S L="40" X="500" H="40" Y="320" T="16" P="1,0,0.3,0.2,0,1,0,0" /><S L="40" H="40" X="300" Y="220" T="16" P="1,0,0.3,0.2,0,1,0,0" /></S><D><DS Y="370" X="400" /></D><O><O C="10" Y="100" P="0" X="300" /></O><L><JPL M2="2" c="00000,2,.5,0" P4="300,100" M1="1" P3="500,100" /></L></Z></C>
M1="z"
Effect: Sets the first ground to link to.
Arguments:
- z (integer) - The Z index of the first ground to link to.
Example: Links the ground Z index 1.
<C><P /><Z><S><S L="400" X="400" H="20" Y="390" T="0" P="0,0,0.3,0.2,0,0,0,0" /><S L="40" X="500" H="40" Y="320" T="16" P="1,0,0.3,0.2,0,1,0,0" /><S L="40" H="40" X="300" Y="220" T="16" P="1,0,0.3,0.2,0,1,0,0" /></S><D><DS Y="370" X="400" /></D><O><O C="10" Y="100" P="0" X="300" /></O><L><JPL M2="2" c="00000,2,.5,0" P4="300,100" M1="1" P3="500,100" /></L></Z></C>
M2="z"
Effect: Sets the second ground to link to.
Arguments:
- z (integer) - The Z index of the second ground to link to.
Example: Links the ground Z index 2.
<C><P /><Z><S><S L="400" X="400" H="20" Y="390" T="0" P="0,0,0.3,0.2,0,0,0,0" /><S L="40" X="500" H="40" Y="320" T="16" P="1,0,0.3,0.2,0,1,0,0" /><S L="40" H="40" X="300" Y="220" T="16" P="1,0,0.3,0.2,0,1,0,0" /></S><D><DS Y="370" X="400" /></D><O><O C="10" Y="100" P="0" X="300" /></O><L><JPL M2="2" c="00000,2,.5,0" P4="300,100" M1="1" P3="500,100" /></L></Z></C>
P1="x,y"
Effect: Sets the coordinates on the map where the first ground is to be linked.
Arguments:
- x (coordinate) - The x coordinate where the joint is to be linked to the first ground.
- y (coordinate) - The y coordinate where the joint is to be linked to the first ground.
Example: Links the ground Z index 1 at x: 500 y: 200.
<C><P /><Z><S><S L="400" H="20" X="400" Y="390" T="0" P="0,0,0.3,0.2,0,0,0,0" /><S L="40" H="40" X="500" Y="320" T="16" P="1,0,0.3,0.2,0,1,0,0" /><S L="40" X="300" H="40" Y="220" T="16" P="1,0,0.3,0.2,0,1,0,0" /></S><D><DS Y="370" X="400" /></D><O><O C="10" Y="100" X="300" P="0" /></O><L><JPL M2="2" P1="500,200" c="00000,2,.5,0" P4="300,100" M1="1" P3="500,100" /></L></Z></C>
P2="x,y"
Effect: Sets the coordinates on the map where the second ground is to be linked.
Arguments:
- x (coordinate) - The x coordinate where the joint is to be linked to the second ground.
- y (coordinate) - The y coordinate where the joint is to be linked to the second ground.
Example: Links the ground Z index 1 at x: 300 y: 200.
<C><P /><Z><S><S L="400" H="20" X="400" Y="390" T="0" P="0,0,0.3,0.2,0,0,0,0" /><S L="40" H="40" X="500" Y="320" T="16" P="1,0,0.3,0.2,0,1,0,0" /><S L="40" X="300" H="40" Y="220" T="16" P="1,0,0.3,0.2,0,1,0,0" /></S><D><DS Y="370" X="400" /></D><O><O C="10" Y="100" X="300" P="0" /></O><L><JPL M2="2" c="00000,2,.5,0" P2="300,200" P4="300,100" M1="1" P3="500,100" /></L></Z></C>
P3="x,y"
Effect: Sets the coordinates on the map where the first pulley point (above the first ground at M1) is to be linked.
Arguments:
- x (coordinate) - The x coordinate where the pulley point is to be.
- y (coordinate) - The y coordinate where the pulley point is to be.
Example: Puts the first pulley point at x: 500, y: 100 .
<C><P /><Z><S><S L="400" H="20" X="400" Y="390" T="0" P="0,0,0.3,0.2,0,0,0,0" /><S L="40" H="40" X="500" Y="320" T="16" P="1,0,0.3,0.2,0,1,0,0" /><S L="40" X="300" H="40" Y="220" T="16" P="1,0,0.3,0.2,0,1,0,0" /></S><D><DS Y="370" X="400" /></D><O><O C="10" Y="100" X="300" P="0" /></O><L><JPL M2="2" c="00000,2,.5,0" P4="300,100" M1="1" P3="500,100" /></L></Z></C>
P4="x,y"
Effect: Sets the coordinates on the map where the second pulley point (above the second ground at M2) is to be linked.
Arguments:
- x (coordinate) - The x coordinate where the pulley point is to be.
- y (coordinate) - The y coordinate where the pulley point is to be.
Example: Puts the second pulley point at x: 300, y: 100 .
<C><P /><Z><S><S L="400" H="20" X="400" Y="390" T="0" P="0,0,0.3,0.2,0,0,0,0" /><S L="40" H="40" X="500" Y="320" T="16" P="1,0,0.3,0.2,0,1,0,0" /><S L="40" X="300" H="40" Y="220" T="16" P="1,0,0.3,0.2,0,1,0,0" /></S><D><DS Y="370" X="400" /></D><O><O C="10" Y="100" X="300" P="0" /></O><L><JPL M2="2" c="00000,2,.5,0" P4="300,100" M1="1" P3="500,100" /></L></Z></C>
R="ratio"
Effect: Sets the pulley ratio.
Arguments:
- ratio (coordinate) - The ratio of movement. M1 will move the ratio units for every one unit of movement at M2.
Example: Sets the ratio to 5. The ground at M1 will move 5 units for every movement of M2 at one unit.
<C><P /><Z><S><S L="400" H="20" X="400" Y="390" T="0" P="0,0,0.3,0.2,0,0,0,0" /><S L="40" H="40" X="500" Y="320" T="16" P="1,0,0.3,0.2,0,1,0,0" /><S L="40" X="300" H="40" Y="220" T="16" P="1,0,0.3,0.2,0,1,0,0" /></S><D><DS Y="370" X="400" /></D><O><O C="10" Y="100" X="300" P="0" /></O><L><JPL M2="2" R="5" P1="500,200" c="00000,2,.5,0" P4="300,100" M1="1" P3="500,100" /></L></Z></C>
Revolute joint
<JR /> tag
These tags go into the <JR /> tag and specify the properties of the revolute joint.
LIM1="value"
Effect: Sets the joint's lower limit of movement (anticlockwise).
Arguments:
- value (decimal) - The anticlockwise limit of movement. Given in radians, and should always be a negative value.
Example: Limits the ground rotation to 90 degrees anticlockwise (-1.5708 radians).
<C><P /><Z><S><S L="400" X="400" H="20" Y="390" T="0" P="0,0,0.3,0.2,0,0,0,0" /><S L="40" X="500" H="40" Y="320" T="16" P="1,0,0.3,0.2,0,0,0,0" /></S><D><DS Y="370" X="400" /></D><O /><L><JR M2="1" MV="Infinity,-2" LIM1="-1.5708" /></L></Z></C>
LIM2="value"
Effect: Sets the joint's upper limit of movement (clockwise).
Arguments:
- value (decimal) - The clockwise limit of movement. Given in radians, and should always be a positive value.
Example: Limits the ground rotation to 90 degrees clockwise (1.5708 radians).
<C><P /><Z><S><S L="400" X="400" H="20" Y="390" T="0" P="0,0,0.3,0.2,0,0,0,0" /><S L="40" X="500" H="40" Y="320" T="16" P="1,0,0.3,0.2,0,0,0,0" /></S><D><DS Y="370" X="400" /></D><O /><L><JR M2="1" MV="Infinity,2" LIM2="1.5708" /></L></Z></C>
M1="z"
Effect: Sets the first ground to link to.
Arguments:
- z (integer) - The Z index of the first ground to link to.
Example: Links the ground Z index 1.
<C><P /><Z><S><S L="400" X="400" H="20" Y="390" T="0" P="0,0,0.3,0.2,0,0,0,0" /><S L="40" X="500" H="40" Y="130" T="16" P="1,0,0.3,0.2,0,0,0,0" /><S L="40" H="40" X="300" Y="130" T="16" P="0,0,0.3,0.2,0,0,0,0" /></S><D><DS Y="370" X="400" /></D><O /><L><JR M2="2" MV="Infinity,2" M1="1" /></L></Z></C>
M2="z"
Effect: Sets the second ground to link to.
Arguments:
- z (integer) - The Z index of the second ground to link to.
Example: Links the ground Z index 2.
<C><P /><Z><S><S L="400" X="400" H="20" Y="390" T="0" P="0,0,0.3,0.2,0,0,0,0" /><S L="40" X="500" H="40" Y="130" T="16" P="1,0,0.3,0.2,0,0,0,0" /><
<C><P /><Z><S><S L="40" H="40" X="300" Y="130" T="16" P="0,0,0.3,0.2,0,0,0,0" /></S><D><DS Y="370" X="400" /></D><O /><L><JR M2="2" MV="Infinity,2" M1="1" /></L></Z></C>
MV="power,speed"
Effect: Sets the ground motor power and speed.
Arguments:
- power (integer) - The power of the ground. Lower values allow for it to be backdriven whereas higher values make it harder to backdrive. For best stability a value of Infinity may be used.
- speed (integer) - The speed of the ground. If negative, the ground will go anticlockwise. If positive the ground will go clockwise.
Example: Powers the ground so that it moves clockwise.
<C><P /><Z><S><S L="40" H="40" X="300" Y="130" T="16" P="0,0,0.3,0.2,0,0,0,0" /></S><D><DS Y="370" X="400" /></D><O /><L><JR M2="2" MV="Infinity,2" M1="1" /></L></Z></C>
P1="x,y"
Effect: Sets the coordinates on the map where the first ground is to be linked.
Arguments:
- x (coordinate) - The x coordinate where the joint is to be linked to the first ground.
- y (coordinate) - The y coordinate where the joint is to be linked to the first ground.
Example: Links the ground at M1 at x: 500 y: 0.
<C><P /><Z><S><S L="400" H="20" X="400" Y="390" T="0" P="0,0,0.3,0.2,0,0,0,0" /><S L="40" H="40" X="500" Y="130" T="16" P="1,0,0.3,0.2,0,0,0,0" /><S L="40" X="300" H="40" Y="130" T="16" P="0,0,0.3,0.2,0,0,0,0" /></S><D><DS Y="370" X="400" /></D><O /><L><JR M2="2" MV="Infinity,2" M1="1" P1="500,0" /></L></Z></C>
P2="x,y"
Effect: Sets the coordinates on the map where the second ground is to be linked.
Arguments:
- x (coordinate) - The x coordinate where the joint is to be linked to the second ground.
- y (coordinate) - The y coordinate where the joint is to be linked to the second ground.
Example: Links the ground at M2 at x: 300 y: 0.
<C><P /><Z><S><S L="400" X="400" H="20" Y="390" T="0" P="0,0,0.3,0.2,0,0,0,0" /><S L="40" X="500" H="40" Y="130" T="16" P="1,0,0.3,0.2,0,0,0,0" /><S L="40" H="40" X="300" Y="130" T="16" P="0,0,0.3,0.2,0,0,0,0" /></S><D><DS Y="370" X="400" /></D><O /><L><JR P2="300,0" M2="2" MV="Infinity,2" M1="1" /></L></Z></C>
External links
- XML Documentation (last updated in 2018)
- Unavailable parameters (last updated in 2018)
- Lua script that tells you the XML of any map